Abner Velazquez

Sneak Peak of
My Creative Process


Step 1
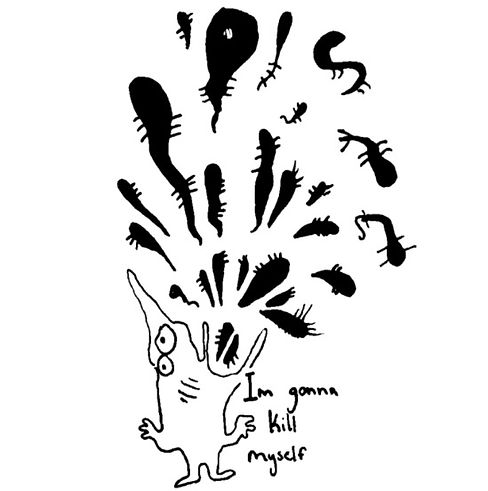
Case Study Sketch
My process typically revolves around free sketching, I usually just draw out doodles into my sketchbook from my subconcious thoughts whilst listening to music, podcasts or even idle conversation. Sometimes I look back into my sketchbook and pick out which sketches I find to be the most interesting conceptually and once I find something I really enjoy, I take the sketches and scan them. Once they get scanned they usually end up getting rendered into a bigger format or into a digital painting program to use as a reference. As you can see from the photo’s Android UI, most of the digital illustrations are done on my phone using the program “Ibis Paint X”. Once I have the digital illustration into a layer, I make it transparent in order to trace and refine my design.
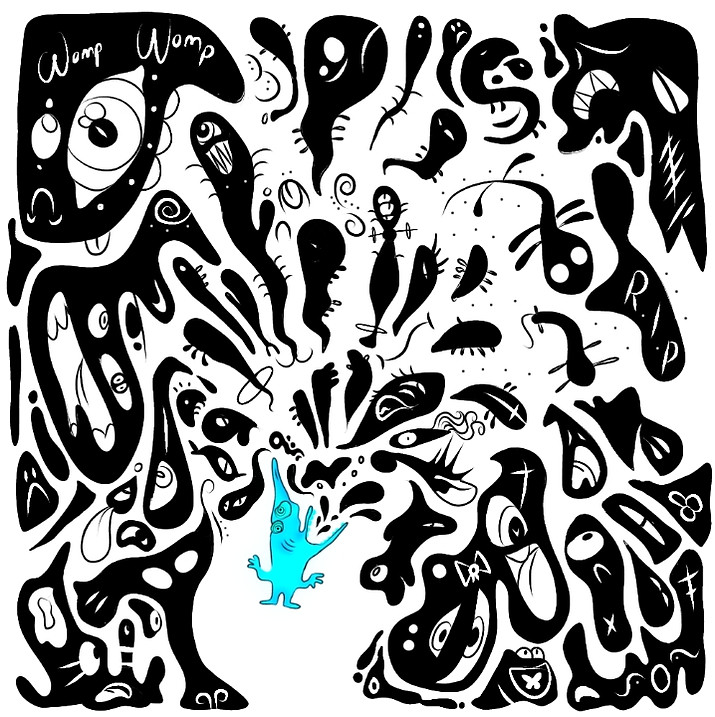
Case Study Sketch

Step 2
Character Design
I seperate different aspects of my designs and trace them onto different layers so I can edit and go back to fix whatever it is that I want to fix. As you can see here, I made the small subject character on its own layer and gave him some color and texture, I put him in this temporary blue color in order to see him better once I put in a solid color fill as a contrast.
Step 3
Background
Once I am happy with my character, I focus on the rest of the illustration. Here I expanded on the little black creatures and gave them all individual personalities/designs. My main goal now is to fit them into a solidified composition that gives the character depth. This part takes alot of trial and error because there is so much to focus on

Step 4
Background Coloring
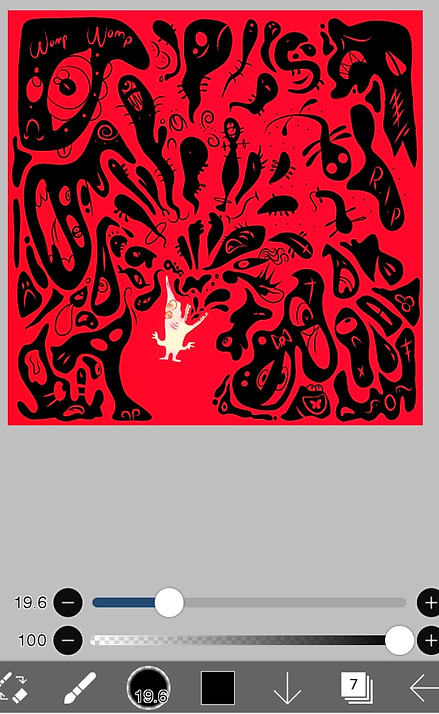
Once I am happy with everything, I mess with a few blending modes to put on my character, I think that the best blending mode would be difference to obtain a guaranteed contrast with my background color fill and my subject character.
Step 5
Blending Modes
Here I put a background to frame the piece, the red seems to be the best choice because it makes the figure stand out while also framing the black figures

Step 6
Finishing Touches
Once I am happy with the composition, character design and everything else I include the finishing touches, such as the shadow to make the space that the figure is in seem more in depth and three dimensional, then I add the text around the figure to add to the clutter and take away from the empty awkard space.